

Guida introduttiva per gli utenti
Benvenuti
Benvenuti nel CGM PORTAL!
Questa piattaforma globale è il vostro punto di riferimento per accedere alla nostra knowledge base, ai vostri ticket, alle vostre fatture e persino per gestire i dati della vostra organizzazione.
In questa Guida Introduttiva vi guideremo attraverso la struttura del CGM PORTAL e vi aiuteremo a muovere i primi passi nell'utilizzo delle sue funzionalità.
Iniziamo il vostro viaggio con il CGM PORTAL!
Panoramica del Portale
Dopo esservi registrati con successo, è il momento di accedere al CGM PORTAL e sbloccarne tutto il potenziale!
Se effettuate l'accesso per la prima volta, il sistema mostrerà un messaggio di benvenuto e un link alla nostra Guida Introduttiva. Queste informazioni vi aiuteranno, dopo il primo login, a orientarvi rapidamente all'interno del sistema.
Il pop-up include una casella di controllo (checkbox) che potete attivare per evitare che questa finestra di benvenuto venga visualizzata di nuovo al prossimo login.

Una volta effettuato l’accesso, ti troverai sulla DASHBOARD. La DASHBOARD offre un rapido accesso alle funzionalità essenziali, ti mantiene aggiornato con le ultime novità e fornisce comodi link a ulteriori risorse informative.
Indipendentemente dal tuo ruolo, non avrai accesso solo al DASHBOARD ma anche ai seguenti menu:
- MYORG: Gestisci direttamente la tua organizzazione nel CGM PORTAL.
- SUPPORT: Ricevi assistenza e supporto ogni volta che ne hai bisogno, ad esempio per creare facilmente un ticket.
- NEWS: Rimani aggiornato con importanti novità e comunicazioni.
Usa la barra di navigazione a sinistra per spostarti facilmente tra questi menu.
Non dimenticare di dare un’occhiata all’angolo in alto a destra!
Lì troverai un’icona a forma di campana che ti permette di accedere alle Notifications, grazie alle quali puoi rimanere informato sugli aggiornamenti dei Case. Inoltre, diverse Profile Settings ti consentono di personalizzare la tua esperienza nel CGM PORTAL.
Preparati a esplorare, interagire e sfruttare al massimo il tuo percorso con il CGM PORTAL!

Su tutte le pagine chiave e funzionalità dell’intero CGM PORTAL troverai delle icone di help (punti interrogativi). Facendo clic su una di queste icone si aprirà, sul lato destro, il corrispondente articolo della Knowledge Base che spiega la relativa funzionalità.

I tuoi primi passi...
Per familiarizzare con il CGM PORTAL, ti suggeriamo di iniziare con i seguenti passi iniziali. Tuttavia, sentiti libero di esplorare lo strumento al tuo ritmo e di scoprirne tutto il potenziale. I passi iniziali che seguono sono pensati per gli utenti con ruolo Customer User. Se hai il ruolo Admin, ti consigliamo invece la seguente Getting Started Guide for Admin users.
1. Modifica le tue Impostazioni del profilo
Per personalizzare la tua esperienza, inizia modificando il tuo profile settings.
Per farlo, segui questi passaggi:
-
Nell’angolo in alto a destra, fai clic sul tuo profilo e seleziona My Profile.
Vedrai diverse schede nella schermata, nelle quali puoi modificare i dati o accedere ai Ticket:
- Dettagli personali e dell'organizzazione
- Ticket di assistenza
- Appuntamenti
- Impostazioni
-
Nella scheda Impostazioni puoi personalizzare la lingua preferita, le impostazioni di notifica, le impostazioni di sottoscrizione e i consensi di marketing in base alle tue esigenze.

2. Creare un Ticket
Se hai qualsiasi problema o domanda riguardo al tuo prodotto CGM, puoi creare un Support Case.
Ci sono due modalità per creare un Ticket:
- Usa il Assistente di Supporto, che ti guiderà passo dopo passo nella creazione del tuo Ticket
- Usa il form Crea un Ticket per un processo di creazione del Ticket ancora più rapido.

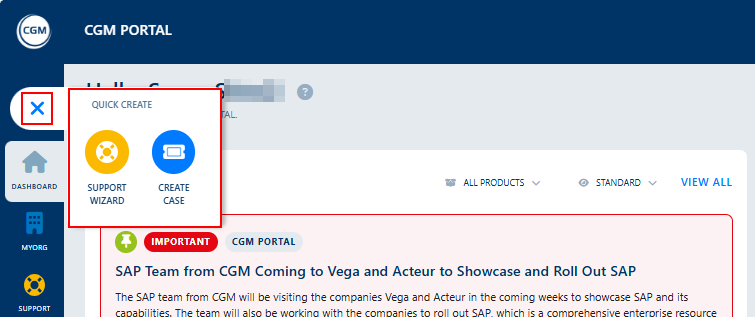
Entrambe le funzionalità sono accessibili come segue:
- Usa la funzione Creazione Rapida. Per farlo, fai clic sul pulsante blu con il simbolo più bianco, situato sopra la barra di navigazione sul lato sinistro.
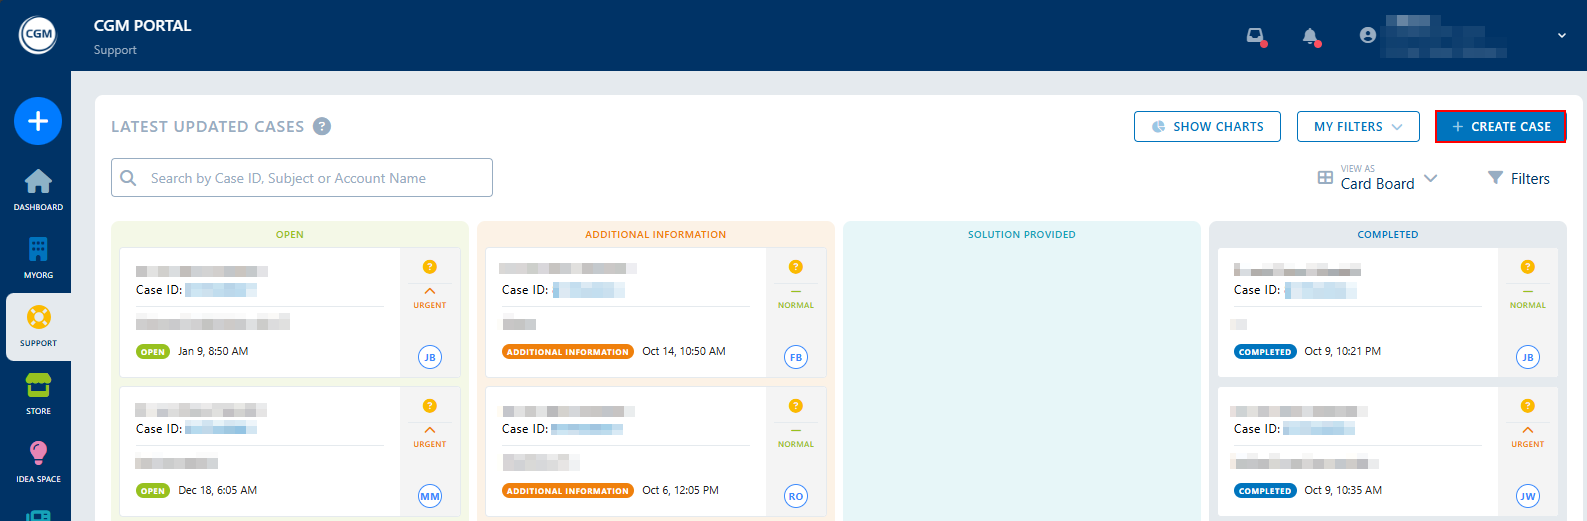
- Usa il menu SUPPORT. Per farlo, fai clic sul pulsante Crea un Ticket sul lato destro.
3. Controlla le tue Notifiche
Hai ricevuto delle notifications? Puoi trovarle facendo clic sull’icona a forma di campana accanto al profilo in alto a destra.
Se ci sono nuove notifiche, vedrai un punto rosso accanto alla campana: 
Fai clic sulla campana per vedere le notifiche. Le notifiche non lette sono contrassegnate da un punto rosso.
Facendo clic su una notifica nell’elenco verrai portato direttamente al Ticket o all’informazione corrispondente.

4. Imposta filtri personalizzati per i Ticket
Impostando individual case filters, puoi trovare in modo rapido ed efficiente i Ticket più rilevanti per te. Prendi il controllo della tua esperienza nel portale e risparmia tempo prezioso utilizzando questa potente funzionalità.
La vista Schede (Kanban), la Vista elenco e Mostra Grafici nel menu SUPPORT offrono già una panoramica dei tuoi Ticket.

Inoltre, ciascuno di questi punti di accesso nel menu SUPPORT offre la possibilità di cercare e filtrare i tuoi Ticket.
Per creare il tuo filtro personalizzato per i Ticket, segui questi passaggi:
- Fai clic sul pulsante Filtri. Verranno visualizzati diversi campi a tendina con varie opzioni di filtro.
- Scegli i criteri di filtro che meglio si adattano alle tue esigenze.
- Fai clic sul pulsante Salva.
- Nella finestra pop-up, inserisci un nome e una descrizione in modo da distinguerlo facilmente dagli altri filtri individuali.
- Una volta salvato, potrai accedere al tuo filtro personalizzato ogni volta che ne hai bisogno: ti basta fare clic sul pulsante I miei Filtri e selezionare il filtro che vuoi applicare.
