Creating a Support Case
Overview
A Support Case can be created in case of issues/questions regarding a CGM Software.
It can be created either via the Case Creation form or via the Support Wizard.
- Case Creation form: Enables you to create a Case via a one-page Case Creation form
- Support Wizard: Enables you to create a Case by guiding you step by step through the case creation process.
Creation via Case Creation form
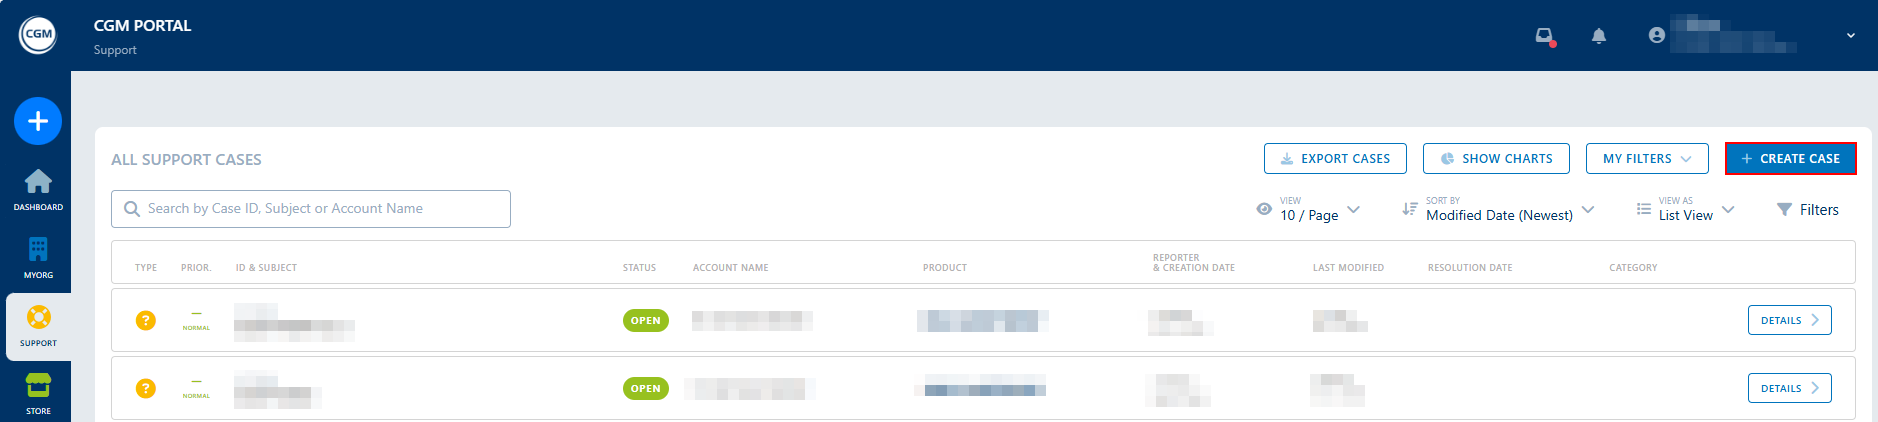
1. In the CGM PORTAL, go to the Create Case functionality using one of the following entry points:
a) In the navigation bar on the left, click the '+' button and select Create Case.

b) In the SUPPORT menu, click Create Case.
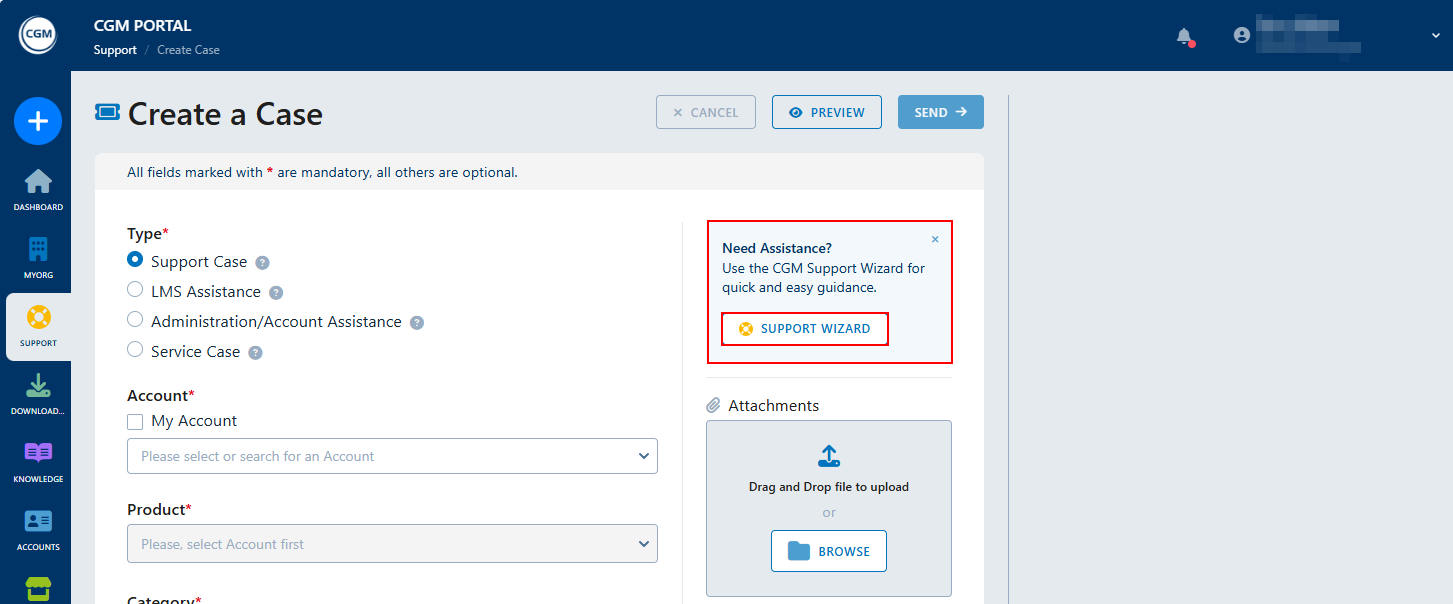
2. In the Case Creation form, select case type Support Case and maintain at least all mandatory fields.
| Field | Description |
|---|---|
|
Type |
Support Case |
|
Account |
Select the account for which the case should be created. You can search for all name components, the account ID, or the City. |
|
Product |
Select the product that the case refers to. |
|
Category |
Depends on the selected product. |
|
External Case Number |
Enter your own external ticket reference to easier track cases across systems. |
|
Priority |
Select the priority for the case.
|
|
Subject |
Is prefilled with your search term from the Knowledge Base search. Adjust it or enter a suitable descriptive title for this case. |
|
Description |
Enter a detailed description for this case. |
Optionally, upload a file. A list of supported file types can be found here: Supported File Types For Attachments.
Note: We support file sizes up to 100MB. If a file is larger than 10MB, it will be uploaded to our secure cloud system. When uploading a file, the system will show a pop-up asking you to confirm that the file does not contain any protected health information (according to HIPAA regulations). If you do not confirm, you will not be able to upload the file.
3. Knowledge Base integration
Note: This functionality is not yet available for all products. We are working on providing this functionality in all products soon.
Once you have selected the product, the Browse CGM's Knowledge Base section becomes visible in the sidebar on the right.
Here, you can directly enter a search term to search for the required information before submitting the Support Case.
The available knowledge base articles are pre-filtered based on the Product that you have selected in the form.
If you enter a Subject, this subject will be automatically used to search the Knowledge Base.
To display the full article, either click the title of the article or the READ MORE link. This will open the article in the KNOWLEDGE menu on a new tab.

If a Knowledge Base article provided the required information, you can click Yes, issue resolved and cancel the Case Creation process.
If you did not find what you are looking for, you can either
- click No, back to Knowledge Base to search for other articles.
- go back to the tab where you started to create a case and complete it.
- click No, create a Support Case to open a new Case Creation form. The Subject field is pre-filled with the search term from the Knowledge Base. You can, however, adjust the subject for your Support Case, if necessary.
4. Live Chat: If Live Chat is available for the selected product and a Support employee is available, a note is displayed below the Product field and a pop-up indicates that you can start a chat with a Support Agent.
Note: This functionality is not yet available for all products. It will be implemented gradually.

5. Optional: Before submitting the Support Case, you can preview the Support Case by clicking Preview.
6. Click Send to submit the Support Case.
7. The system displays a success message and provides the following options:
- Case Details: Navigates into your submitted Support Case to display its details.
- Support Dashboard: Navigates to the Support Dashboard.
Creation via Support Wizard
1. Navigate to the Support Wizard using one of the following procedures:
a) In the navigation bar on the left, click on the '+' button and select Support Wizard.

b) In the SUPPORT menu, click Create Case.
2. In the Case Creation view, click the Support Wizard button.
3. Select Support Case.

4. If your user belongs to a customer with a branch/subsidiary, you need to select the respective Account for which the Support Case should be created. Otherwise, you will continue with the Product selection.
5. Select the respective Product for which you want to create the case. Your primary product will always be flagged accordingly.

If the Live Chat is available, the product is flagged accordingly:

6. Select the Category. The proposed Categories might differ depending on the selected Product. Depending on the product, you might also have to select a sub-category.

7. Knowledge Base integration:
Note: This functionality is not yet available for all products. We are working on providing this functionality in all products soon.
Once the Category has been selected, you can enter a search term to search the integrated Knowledge Base for available documentation or troubleshooting articles.
The knowledge base articles are pre-filtered based on the product that you have selected before and also based on the language that is currently set up in the portal.
However, you can adjust these filter criteria and search for articles based on other products or which are available in other languages. To do so, use the Filters section on the left side and activate the checkboxes according to your needs.
If no article could be found, the following options are available:
- Create a Support Ticket
- Chat with Support Team (This functionality is not yet available for all products. It will be implemented gradually.)
This will open the Chat and you can chat live with a Support Agent.


If articles were found, you can click the READ MORE link at the bottom of the article to display the full content of this knowledge base article.
If an article provided the necessary information, click Yes, issue resolved in the sidebar on the right.
If you did not find what you are looking for, click No, create a Support Case.

8. If you clicked No, create a Support Case, a form is displayed to create a Support Case.
Enter the details for the Support Case.
| Field | Description |
|---|---|
|
External Case Number |
Enter your own external ticket reference to easier track cases across systems. |
|
Priority |
Select the priority for the case.
|
|
Subject |
Is prefilled with your search term from the Knowledge Base search. Adjust it or enter a suitable descriptive title for this case. |
|
Description |
Enter a detailed description for this case. |
Optionally, upload a file. A list of supported file types can be found here: Supported File Types For Attachments.
Note: We support file sizes up to 100MB. If a file is larger than 10MB, it will be uploaded to our secure cloud system.
When uploading a file, the system will show a pop-up asking you to confirm that the file does not contain any protected health information (according to HIPAA regulations). If you do not confirm, you will not be able to upload the file.

9. Optional: Before submitting the Support Case, you can preview the Support Case by clicking Preview.
10. Click Send to submit the Support Case.
11. The system displays a success message and provides the following options:
- Case Details: Navigates into your submitted Support Case to display its details.
- Support Dashboard: Navigates to the Support Dashboard.