Creating a Retail Quote
To create a Retail Quote, proceed as follows:
1. In the ORDERS menu, click Create New Order.

2. Select Retail Quote.
Note: The available Order/Quote types depend on the configuration.
If only one order type is configured, the system will skip the Order Type selection step and directly display the Account selection step.
If two or more order types are configured for your organization, the system will provide the respective order types for selection.
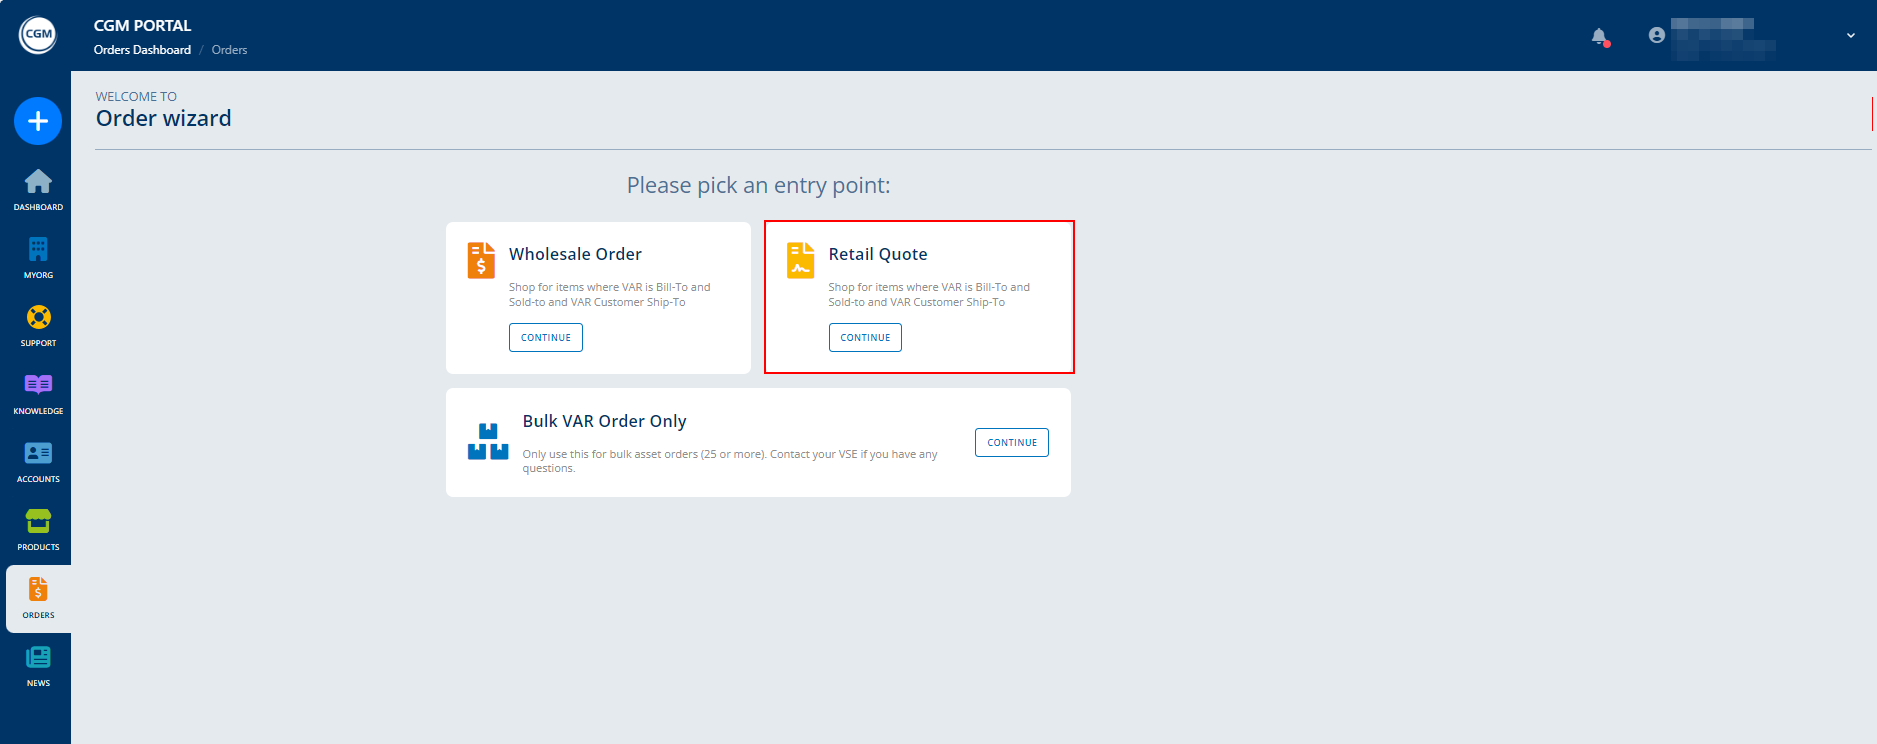
3. Once you have selected the order type, the system displays a list of your customer accounts.
Here, click Select to select the customer account for which you want to buy products.

4. On the next screen, you select the contact person of the customer account.
If the contact list is long, you can either
- Search for a contact by full name or Personal ID.
- Use pagination and change how many entries per page are displayed.
If the selected account does not have any contacts yet, a respective message is shown and you can create a new contact by clicking the Add New Contact button. You will then be directed to the contact creation form, with the account already preselected.
Once you have created the new contact person, a success dialog offers you to return to the order process where you can then select the newly created contact from the list and continue with the product selection step.

5. On the next page, select the products you want to include in the quote.
You can search for a specific product name using the search field or filter the product list based on the filter options on the left-hand side:
- Product
- Payment Model
- Material Group
Add a product to the Shopping Cart by clicking the plus icon, or remove a product by clicking the minus icon. By doing so, you can also adjust the quantity of the selected product.

6. The number of products in the Shopping Cart is displayed at the top next to the Shopping Cart icon.
You can display the items in the Shopping Cart as follows:
- Click on the triangle icon.
- Click on the Shopping Cart icon.

Important: The price determination for Retail Quotes refers to the customer price (usually the list price), not the price for you as a partner.
7. If the products and their quantities in the Shopping Cart are correct, click Proceed To Checkout (or Checkout in the Shopping Cart pop-up).

8. On the Checkout screen, a real-time price determination is executed again.
On the left side, you can:
- enter an External Reference Number.
- add a Note.
On the right side, you can view information such as the Product ID, Product Name, Material Group, License, Price (including commission, if available), and more.
If the Rental Option has been set up for a product, a toggle is displayed below the product. If you activate the toggle, the system displays the rental price. See also article Product Rental Option in Quotes.

9. If all the information is correct, create the quote by clicking the Create Quote button.
Alternatively, you can:
- save the quote as a template via button Save As Favorite. The quote template will then be available in the ORDERS menu on tab Favorites.
- cancel the quote creation.
- go Back To Products.

10. After clicking Create Quote, you will be prompted to agree with the Order Policy. To confirm, activate the checkbox and click Create Quote.

11. Once the quote has been generated, the Quote Details are displayed.
Here, click Continue To Documentation.

12. In the Documentation step, you can:

| DocuSign | Offline |
|
If the DocuSign process is used, you can: Select the contact person (recipient) that should receive the quote. Recipient The contact that you selected earlier in the Contact step is already preselected. It is possible to remove the contact or to add additional recipients.
The recipient can be selected either by clicking on it in the list, or by entering the name manually via the Add Manually button.
You can add up to two quote recipients. Click on Go to next step to proceed.
Email Details Here, adjust the subject, if required, and write the message that should be sent together with the quote. Email Templates You can save an email subject and message as a template by clicking Save As Template. For more information about email templates, see article Email Templates for DocuSign Quotes. Click Continue to next step.
Documents On the next screen, you can
On the next page, click Preview and Send. Here, you can adjust your quote, if needed, by clicking Edit in section Subject & Message. The system will go back to step Email details.
Click the Send Email With Documents button to send the e-mail containing a link to the quote to the selected contact person (recipient) via DocuSign. The system will display a success message once the quote has been assigned. The status of the quote in the CGM PORTAL will automatically be changed to Waiting for Customer Signature. The quote is available in the Orders menu on the Quotes tab. The customer will receive the email containing the link to the DocuSign quote. Clicking the link will direct the customer to the DocuSign website. Here, the customer can decide whether or not to sign the quote. If the customer signed the quote in DocuSign, an e-mail with the link to the DocuSign quote is sent to the countersigner at CGM (if set up) and the status of the quote in the CGM PORTAL is automatically changed to Waiting for CGM Signature. As soon as the customer has completed the signature, you as the partner will automatically receive an email notification. This email comes directly from DocuSign and confirms that the quote has been signed. If the customer rejected the quote, the status of the quote in the CGM PORTAL is changed to Rejected by Customer. Once the countersigner at CGM signed the DocuSign quote (if set up), the status of the quote in the CGM PORTAL is automatically changed to Placed and the quote is converted into an Order. The order is then visible on the Orders tab. |
If the Offline process is used for a quote, you can:
Once the main contract has been signed and uploaded, place the order by clicking Place Order to convert the quote into an order. The Order is then available in the ORDERS menu on the Orders tab. |


See also article Ordering Products Again.
- view, download, or print the quote (main contract) using the Download button.
- decide whether to send the quote to the customer for signature via DocuSign, or download the quote and send it offline via your own email application.